Category: General Information


Hey Guys, When you are trying to Sleep On Bed, But Your Laptop or PC is not Ready to Sleep When idle, Then there are Couple of Options we should try to Let it Accept to sleep As usual. First off, You should try the Procedures Mentioned in Microsoft KB (Knowledge Base) to Put Windows 7 Into Sleep Mode again, and If you have done them and Still not successive, then Try the below Simple Tweak to Let your Laptop/PC Sleep As Usual.

Regular Steps at Microsoft KB Recommends these: If not Done, Click This Link

If tried above all, and still not successed Follow this Simple Step, in Hope of Success

All You have to do is, set Computer to Require Password on Wake, and voilà! Sleep Policy is working Hopefully, which worked for me.

See the below Screenshots:

Thanks!


Hey! Guys, Previously I wrote a Post about on How to Recover Gallery Lock Files, that were Locked with the Password and Password is Lost. The Old Post Saved Some of the Irated Patrons by Recovering Files on Moving to a new Location when Extension of the locked files has been changed from .glk to .jpg or user defined Image Extension. Now in this Post I will push you much needed Information on How to Get the Lost Gallery Lock (pro) Password, so that You Don’t have to move Files or play with the Extensions to Recover Locked Media Files.

For this Trick to Work, Your Device Should Be rooted to Access the Sensitive Root Data Location. The Password and Security Question Answer is saved in an XML File in Preferences Folder of Gallery Lock Application, so we will go and open it up and Will Learn Our Own Password Once again from the XML File. Okay! Straight to the Solution;

Go to root Location of your Device, from File Explorer: Use either ES File Explorer or Root Explorer; but be sure the File explorer has the ability to see the Root folder; Means It is Granted root permissions. The recent versions of ES File Explorer has the Root access when You Change the Settings From ->Other Settings in The ->settings Menu and Then -> Root Settings and then Enabling -> Up to Root and -> Root Explorer Options. Or you can use Root Explorer Application alternatively. But here I have used EX File Explorer, So the Interface Options vary If you choose to use Root explorer, However the Navigation and  File Locations Remain Same throughout Procedures.

See the Below Screenshots:

Once You got Rooted Capable File Explorer -> go to -> “/data/data/com.morrison.gallerylock/shared_prefs” folder and then Find the Preferences.XML File naming “com.morrison.gallerylock_preferences.xml” file  Open this XML file as Text and Then Choose Either ES Note Editor or Any Notepad editor If you have installed Separately and scroll down to find the Password you have forgot in there next to “pwd”> and Your Security Answer too.

Note, You cannot change the Password here in XML file and then Put there in Application for newly changed Password, you have to input the Password that has been saved in XML file and Has to input the same into application and then Have to change the Password from the Application, because of Database Interference.

Thanks, Hope this Helps someone in Need.

Chaladi


With this post, you can enable an option to allow sending to bluetooth devices from right clicking a file. A simple tweak to allow sending files to Bluetooth devices directly from file; by right clicking the file without accessing the Bluetooth Sharing option and then back again Clicking on send to button. With this tweak the time can be saved and little comfortable sending files quickly.

To have this work for you, follow these steps in order:

1- Go to Start Menu and Search for Bluetooth File Transfer

2- Right click the Bluetooth File Transfer and Click Properties

3- Click On Go to File Location from the Properties Dialog Box opened

4- Create a Shortcut or Sendto Desktop Button to the File That was being highlighted when Open File Location is accessed

5- Now Type “shell:sendto” in Start Menu Search box and Open that Folder

6- Now copy the File that was sent to Desktop or shortcut created for it and Paste it in Sendto Folder. You can also Access the Same Folder from this location C:\Users\sreekanth’s\AppData\Roaming\Microsoft\Windows\SendTo

In the above File Path, sreekanth’s should be replaced with your computer user name

And Viola! now you can Have the Bluetooth Option enabled in your Right click Menu. You can Rename the File for your Comfort too..

Thanks


Update: This Method Actually Formats the whole capacity and Will require you to restore your IPOD to factory settings. This is for erasing the Games and some stupid content in IPOD, and freeing up Space for mush desired Music and Videos or required

Hey Guys! Now it’s time to wordpress a situation about Ipod Nano being unrecognized in iTunes or/and Windows Explorer, where nothing ahead we can proceed to make use of IPod. For this process to be able to succeed, we need to see the Device partially recognised, means device is Visible in greyed out or hidden like Volume mounted in Windows Explorer, but when tried to access the disk, it says, Please insert a disk, something like that message. this is to format the Whole iPOD and bring out new fresh IPOD. But if you wish to make use of data in the iPOD, just uninstall the drivers for IPOD in Device Manager and Re-install or scan for new hardware changes being installed itunes and connected to internet for better drivers install.

So, how exactly to solve this problem; here it follows. Once you are confident that the volume is recognised, but cannot access the disk either itunes way or volume way in Windows, you have to go to Command Prompt in Windows by pressing Windows+R key together to start a run dialog box and press CMD in there. or type cmd in Start search box and hit enter. Once you are there at the elevated command prompt type the following commands to check whether your iPOD is recognised as a volume disk or not “cd: F:” Pleas note that, here F is the Disk that Ipod has been granted to mount on Windows. It varies as per your system. To make sure what is your Disk name, check the Windows before connecting IpOD and later , to see the newly mounted Disk. Once confirmed that its the only Disk of IPOD, proceed with the given Disk LEtter

if it says the volume is there but not recognised or corrupted, then with the confident that F or the Given Disk letter, Proceed to format the volume disk with the following commands

“format F:”

Once the command is successfully passed onto IPOD Disk, the Formatting option will start formatting the drive with the New EXFAT file system, that will format the drive and will help you recover the iPOD disk back to working in itunes and Windows being recognised.

Hope this help some frustrated Patrons.

Thank you. any further info or queries, happy to help through comments made here.


Update: USB OTG Helper application will solve NTFS formatted USB Drives to be mounted on phone. THis is available in XDA forums only as of yet!


This is to notify the solution for How to fix the external SD cards mounting issues on windows 7 in Jelly bean or related Android OS.

Jelly Bean Home Screen

If you have came from ICS or GB flavors, the probability is that you have used your file exploreres within your Device to see the Exernal SD card (Micro SD here) and Internal sd card (USB Storage) in an easy ways, representing external Sd card folder and usb storage folders in their respective denomination; an easy navigation, not much confusion isn’t it?.

But ever since JB arrived, the storage devices location are little changed; perhaps accurate this time if get used to; are mounted in “/storage” path as /sdcard0 representing internal USB storage space and /sdcard1 representing microsd card
Another path /USBdisk is for the OTG (On the GO USB cable attached flash drives can be seen there in this path folder.) natively supports FAT/FAT32 formatted USB Flash drives, if NTFS support is needed, try you luck with NTFS Mounter. So, since this path has been changed, some already existing Softlinks (shortcuts in windows context) target to that sdcards.

I can put down a lot of words here, but the solution is important however; for most people, so confining with thus stated information. Since the above mentioned words help for some people who are looking for sdcard locations within their Phone; who confused seeing the external sd card folder empty :-0.
So how to fix mounting issues in windows 8, 7 or Vista is, here: just install Multi Mount SD card from Market or from your known sources and that’s it. You will see the sd cards mounted on your PC and at the same time you can access SD cards on your Phone as well. Try not use the Other methods, when using Multi Mount SD method. use Widget on your screen to activate and deactivate application aka Mounting and Unmounting Disk drives.

Hope this helps some irated patrons.


F18 Carrier Landing HD Game Play

F18 Carrier Landing HD Game Play Video on Samsung Galaxy SII, A speed taxiing, take off and Flings in the Air, Sudden Knots decrement and Landing… Just to show the game play and Enjoyments you can have with the Game; if in your Android Phone.


This Post is Just about Windows 8 Release Preview Edition Sneak Peek. Insider Views and Menus, typical installation screen changes, Accounts activities, Locking and logging off screens, gadget bars and Start menu of new Windows 8 Edition.

Look at the Video and have a great Sneak Peek of Windows 8 Release Preview Edition


I have recently faced this Script error while installing VMware Workstation on my Laptop. This is quite annoying that we can’t past this screen even accepting the error with “YES” or “NO”.

VMware Communities recommended to  install it in Silent mode background install, Hopefully that worked for some people, who are lucky maybe if they haven’t saw this awesome method whilst their time…

This method involves, just changing your temp file directory temporarily. So a minor changes are needed to install VMware Workstation Successfully on your Machine, bypassing the script errors and any issues.

First off, Go to System properties by right-clicking the computer and selecting the properties option, and then following to click the Advanced System Settings in the Left hand side 


Once You are at this Environment Variables Screen, All you have to do is to Edit the TEMP and TMP FILES Path to C:\Tmp path. Once you do that with the system and user variables, the installation will proceed smoothly. Remember to copy the paths of the original “TEMP” and “TMP” paths to “Notepad” to revert back to original TEMP and TMP paths once Workstation installation has been successful. Do for the both System and User environment variables.

When changed to C:\Tmp file path, the extracting files of Vmware workstation would be done to Tmp file in C, where the script errors that are occuring can be fully resolved with this method. The temp path has issues when reading the index.htm file in extracted Vmware folder. You can name your TEMP and TMP files as you wish, but remember to revert back to original PATHS for TEMP and TMP in environment variables, once your installation is made.

Hope this helps other panicked, irritated patrons.

Chaladi


Hi,

In This post, I came forward with a solution for WI-FI connectivity issues on Samsung galaxy SII, where the WI-FI switching is taking too long time to turn on.

I have faced the same problem and been to number of forums; XDA First off and blogs and tried several, though it didn’t worked for me, the motivation lead me to find an alternative way, which will surely work.

First Try, Going to Flight Mode and then Coming Back To Normal Mode, this works major times, If not happy with this process, go ahead with this process… flashing kernel. because the problem is with the drivers that are not properly coordinating with the System Boards. So let’s workaround that way

I have reflashed my Kernel with New latest Siyah Kernel 3.5.2. I am writing this in context of galaxy SII – I9100 Users only and Must be rooted your phone. If you don’t know rooting, you probably can’t try this to fix your issue.

Try flashing your kernel from your CWM manager within your phone or from ODIN tool Either from computer or from your phone having ODIN installed. I recommend CWM, as the flashing process is smooth and goes good. Download the below mentioned files and place the extracted zImage file in your phone and flash em…

Download the Below Files, Any One, as per your procedure requirements


DOWNLOAD TAR (for Odin)

DOWNLOAD ZIP (for CWM Recovery) – This is for CWM process.

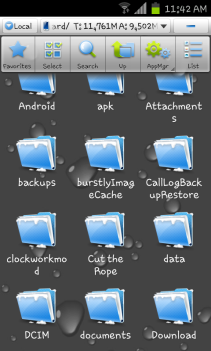
Download this and extract the files from ZIP folder and copy the zImage file in your sdcard location and open the CWM and flash the Kernel, Not the ROM. Be careful, to flash the kernel with this zImage only, If other images are there in the same directory move them, or move this file to new folder, where you can easily recognize the image file location.

CWM MANAGER

From this, you can see, the flash kernel option is available. However since, this is CF-ROOTED and CWM is managed through CF-KERNEL, the flashing of ROM option has been disabled, once the siyah kernel has been flashed for kernel. I respect the Chain Fire however, until new stable WI-FI working kernel is released, I am sticking with Siyah Kernel, as I can use the Dual ROMs now…

Okay. So concisely, Flash your kernel with this latest stable Working Siyah Kernel, You can be on Whatever ROM version, Flash this and See the issues fixed.

For queries or if clarifications is needed with this writing, revert back to me, I am happy to furnish the details.

If not fixed, or facing problems, mention the problems here, and I will be working at my best to fix them for you.


Update: Recover Lost Password Directly Without Needing to Moving Locked Files Read This Post Recover Gallery Lock (pro) Password

Hello, This Post is all about Recovering Locked files from Gallery Lock (pro) Application In Android, in cases like Forgot Password and security Answer. This post helps you recover files easily from either Desktop Comfort or from within Mobile comfort. The files once locked with Gallery Lock are stored in Application Specific Directory; that is Data Directory in the Phone’s Memory.

Check the below screenshots:

ImageImage

Once You accessed the Data Directory of gallery Lock, the Protected Folder is presented, which contains the locked files with the .glk extension. All you have to do is, cut them all; needed files and paste to some other folder (You need to move the files, because later if you ever wanted to lock the files again or just wanted to uninstall the Application; you will be in big trouble loosing your files)  Rename the files with .jpeg extension; And you have just successfully unlocked aka recovered aka rescued files. In-case you wanted to do this in windows with the usb storage mounted onto Windows, you have to go into the same folders specified and move the files to different folder  (Note that the visibility of known file types extensions are hidden in the  Folder Options in Windows, so you have to first disable this option and proceed to rename the files to .jpeg extension) Detailed instructions given below:

Hide_known_file_types

renaming


In cases like if you have groove installed in your system with the Office product installed, the chances of changing the file extension will be difficult, so I have addressed the same issue and came forward with the solution. See the below screenshots. The file association should be changed in the control panel to fix this case, once you change the file association to txt or someother type, you will be able to rename the extension from windows explorer context.

grooveopen

settingassociations


Once you are in the file association menu, change the file association to notepad and apply, then you are presented with the extension views for the .glk files in windows. See the below screenshots.

defaultprogsetting

renaming

And that’s it! you are done recovering the files, either way; via Mobile or through Computer rescuing the files. Remember the Via Mobile files recovery here has been made through ES Explorer, a free File Manager to use in Android to explore the files and directories. Thank you. Welcoming Comments and queries