I knew lot of patrons are looking forward for this post, however at the same time some were already educated about this. But, this post will be real benefit for patrons who are keen to improve their Windows performances and increase system response time and decrease system load timings.
Lot of general Windows users tend to delete temp, %TMP% and PREFETCH files to see if that action does anything they were expecting. Well, the news is, that really doesn’t help much, but I must admit that, it is the Real First Step you should consider doing, when you felt that your Windows is slow. What really that does is: deleting the tmp, %TMP%, and Prefetch files frees up the some portion of your RAM Cache Memory and Windows Partition Disk space. You can start with these approaches, but you should continue the remaining steps to control your Windows completely about it’s performance.
You type the below commands and Delete the Items listed there. Use SHIFT+DELTE Combinations to delete permanently items from your computer.


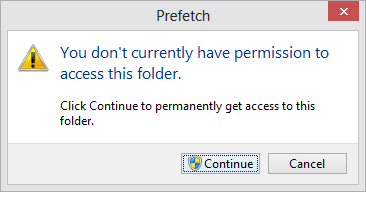 Remember that to Access Prefetched Items in your Windows, You need Admin Rights. And as you can Imagine, this deletes the temporary files and files those were ready to access files for some applications will be cleared off. But that really does no help in performance improvement, where in some cases the Applications those relying on temp files and prefetched files will load up slow to get all the DATA again from the applications data from hard disk and put on into RAM for access.
So, to get the real benefit from performance improvement, follow the rest steps below.
You really should use MSCONFIG to suppress some of the Applications and services those put System Start-up pressures and eventually runs in the background unnecessarily eating much of your Valuable RAM. So, what MSCONFIG really does is, it will give control to handle, which applications are allowed along with system starts and which will not.
Once you hit Enter in your Command prompt with MSCONFIG typed, this Dialog Box opens up. The Services Tab in there will list the services which will be started up whilst Windows Boots up!. Remember that, the Dialog box initially loads with Normal Startup as the Startup Selection, what you need to do is, you should select the Selective Startup Radio Button and Navigate to Services and Startup Tabs in Dialog Box presented.
Here, the Services which were presented are allowed to start at Windows Load times. What you really need to do is, Untick the services which were not part of Microsoft Services; tick the Hide All Microsoft Services and Isolate the services to start at System Loads. Remember this window is representing the Windows 8 settings and Windows 7 or xp or vista are real similar, except the Startup Items are moved to Task manager in Windows 8 and 7 and previous Windows Versions remain same, having control in the same MSCONFIG settings.
Look at the above Picture, I have hidden all the Microsoft Services, to not to accidentally disable any Windows sort of Services, allowing myself to not to boot into system with required services disabled. :0 Here I have disabled lot of services except Apple Bonjour and Apple Mobile Device; where These are required for iTunes to detect your iPhone or iPad when you connect to your Computer. Other Few services I allowed here are ExpressCache, where cache improves my startup times and ESET is my antivirus programme, which shall not be disabled; any antivirus program shall not be disabled to protect PC.
 The above image tells that to handle the startup items, we need to use task manager and restrict the applications from starting up. See the below images.
 So, I have navigated to Windows 8 task manager to handle the Application startup restrictions. In Windows 7 and Vista, 7 the MSCONFIG will present you the same options there. Here you need to carefully disable the Applications those were not really useful. For example, here in the above image I have disabled all the applications except Windows Host Process, Realtek HD Audio Manager and igfxtray applications, however you can disable the Igrfxtray as well, but remember to not to disable the Windows required applications.
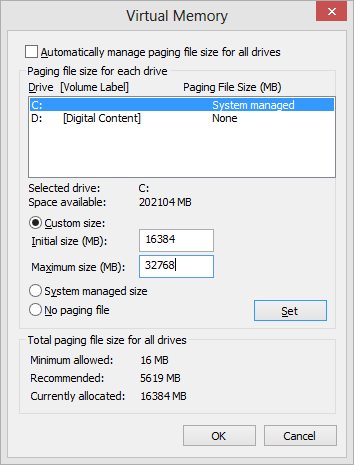
You can also, increase your System Performance by moving you SWAP file aka PAGE file from your Windows Disk to Another DIsk (I said Different Disk, not Different Partition. Remember, moving to another partition doesn’t help you). See the below Screenshots on how to change the SWAP file settings. Here i have not moved the Page File to different Disk, because I don’t have any, rather I manually controlled the Virtual Memory of Windows Drive, where you can increase the Virtual Memory as you desire instead of Windows handling it to 2 Times RAM. These VM settings can be accessed through System Properties-> Advanced System Settings-> Advanced Tab-> Performance settings -> Advanced Tab then on and Selecting the Virtual Memory Settings in the Advanced Window Opened. And then Untick the Automatically Manage Paging file Size for all drives and select Drive you were interested and select Custom Size and increase the value as you desire.
And once these steps are implemented, the next steps to Do is to handle the Windows System Settings to disable some Graphical settings to get most out of our PC.
Go to your Computer and Select system Properties. – Right click on Windows and Select Properties from the Context Menu, which will take you to the System Info Dialog Box. See the below Screenshot:
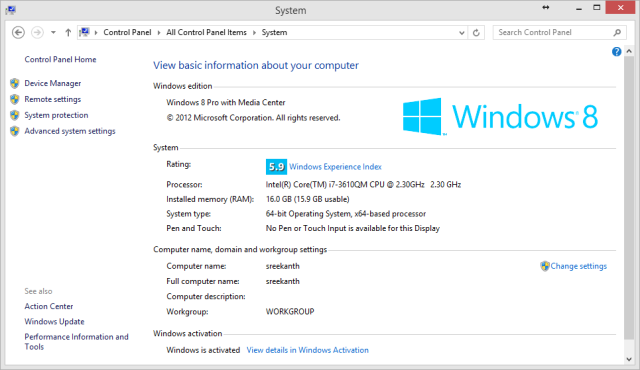 And then Click on Advanced System Settings here in this Windows and Go to Advanced Tab from the Window Opened. From there, Click on Performance Settings Button, which will take you to the Performance Options Windows with Visual Effects Tab selected. Click on Adjust from best Performance from there and select those you were really interested. What this does is, discouraging the Windows to use Graphical Representation and saves some RAM for us. Here I have not changed anything, because my Windows is Perfectly A-OK with 16 Gigs of RAM and Tuneup UP and running for me (oh! what is tuneup? Look at this post finish lines)
Now, Finally these steps will put you in lot better standings than earlier. Reboot and See if these changes have improved your Windows performance.
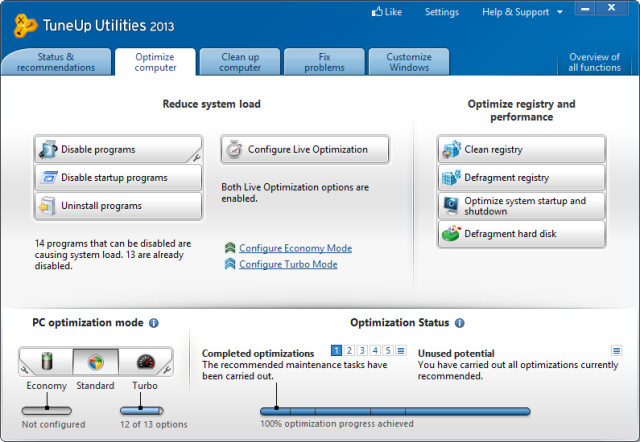
You can/might use CCCleaner sort of things for improvements. But My favorite part is here it comes… The Tuneup Utilities Application. I love this literally and I really encourage to use it for real performance improvements.
Remember to Answer all the Tuneup Asked questions to best improve the performance. It will handle all the Registry cleaning, Defragmenting, Disabling Application background processes and Hell lot of others… It will really pull out all the potential your Windows Has.
Thank you for your real Patience, going through all these hell lot of wordings.
Cheers! CHALADI


