Category: VMWARE


Hello All, this post deals with fixing the ESXi Host, Host name resolution failing in Test Management Network settings.

HostName-Failed

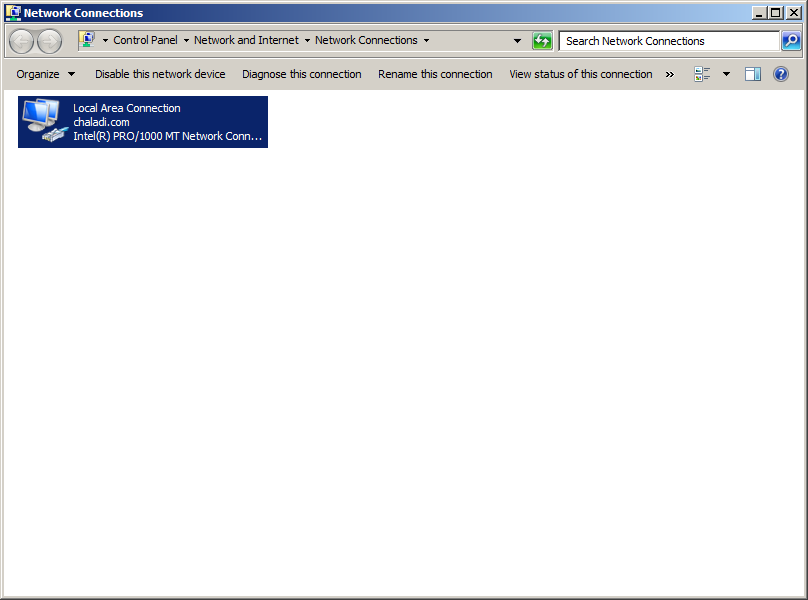
If you have the DNS entry created in your AD, and able to ping the ESXi host from a windows machine, but from ESXi box this is failing, then please follow below steps.

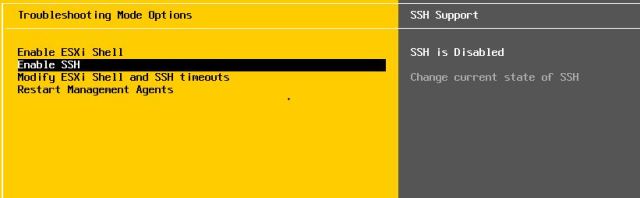
To fix this, all you have to do is – Delete the hosts file backup created in ESXi box. This should be done via SSH, where putty tool is installed in a same LAN windows machine. Note: To access SSH from Putty tool of the ESXi box, you must first enable this SSH from ESXi DCUI interface, that is accessible from ESXi interface by pressing the F2 button. Once in there, you have to select Troubleshooting options and then Enable SSH from there. See below Image…


ssh

Once it is enabled, you can access ESXi shell from Putty tool. Open putty and enter IP or Hostname of ESXi and enter credentials when terminal is open for you.

Putty-1

Navigate to etc directory as shown below and delete the Hosts.backup file from etc dir

Putty-2

Putty-3

ESXi-1

ESXi-Hostname_Success


Recently I have came across this annoying error: Identity source cannot be added in vsphere Web client interface via SSO configuration to add Active Directory to be my Identity Source for Users authentication in my vSphere 5.1 Platform.

LDAP-error-49

The issue is Very straight-forward if you have read the Error description with patience; Authentication issue: Provided Credentials are not valid error. However, the Administrator account seems to be accurate with the password, but still throws this error. IN such cases try the below steps to isolate the issue straight away.

Steps:

1- Make sure the Administrator Password is Correct and it hasn’t changed since last known.

2- Make sure the Administrator account is a member of Domain Administrator account: Will be default, if Default Admin account is being used.

3- If everything is failing, Try using a different Account, whereby promoting/creating a Domain Admin Account and providing the same.

Once the valid credentials are provided, Identity source can be added without fail this time.

You may also encounter, LDAPS security error, where in The Domain Environment, the rejection of normal LDAP protocol is set via Group Policies. In such cases, you should use LDAPS protocol to connect to AD Source and use the certificate of LDAP security. See the below links about the LDAPS error.

http://kb.vmware.com/selfservice/microsites/search.do?language=en_US&cmd=displayKC&externalId=2035934

Video: How to add Identity Source in vSphere 5.1 via Webclient


There can be cases, where when you try to join your client computer to a Domain, it gets authenticated with the Domain Access rights, but Throws error saying “Network Location Cannot Be Reached ”

Microsoft KB says: Enable the TCP/IP Netbios Helper Service  in Services.msc.  But if that service is already up and running, then that KB is invalid.


Follow this procedure to isolate the issue straight away. See the below screenshots for precise referencing.

Enable all the protocols for the Network Adapter you are trying to establish the Connection to the Domain.  enable all the Protocols like Link layer topology and others as seen in the 2nd screenshot.


chaladi-lan adapter Network Location Cannot be Reached - solution


With this post, you can enable an option to allow sending to bluetooth devices from right clicking a file. A simple tweak to allow sending files to Bluetooth devices directly from file; by right clicking the file without accessing the Bluetooth Sharing option and then back again Clicking on send to button. With this tweak the time can be saved and little comfortable sending files quickly.

To have this work for you, follow these steps in order:

1- Go to Start Menu and Search for Bluetooth File Transfer

2- Right click the Bluetooth File Transfer and Click Properties

3- Click On Go to File Location from the Properties Dialog Box opened

4- Create a Shortcut or Sendto Desktop Button to the File That was being highlighted when Open File Location is accessed

5- Now Type “shell:sendto” in Start Menu Search box and Open that Folder

6- Now copy the File that was sent to Desktop or shortcut created for it and Paste it in Sendto Folder. You can also Access the Same Folder from this location C:\Users\sreekanth’s\AppData\Roaming\Microsoft\Windows\SendTo

In the above File Path, sreekanth’s should be replaced with your computer user name

And Viola! now you can Have the Bluetooth Option enabled in your Right click Menu. You can Rename the File for your Comfort too..

Thanks


I have recently faced this Script error while installing VMware Workstation on my Laptop. This is quite annoying that we can’t past this screen even accepting the error with “YES” or “NO”.

VMware Communities recommended to  install it in Silent mode background install, Hopefully that worked for some people, who are lucky maybe if they haven’t saw this awesome method whilst their time…

This method involves, just changing your temp file directory temporarily. So a minor changes are needed to install VMware Workstation Successfully on your Machine, bypassing the script errors and any issues.

First off, Go to System properties by right-clicking the computer and selecting the properties option, and then following to click the Advanced System Settings in the Left hand side 


Once You are at this Environment Variables Screen, All you have to do is to Edit the TEMP and TMP FILES Path to C:\Tmp path. Once you do that with the system and user variables, the installation will proceed smoothly. Remember to copy the paths of the original “TEMP” and “TMP” paths to “Notepad” to revert back to original TEMP and TMP paths once Workstation installation has been successful. Do for the both System and User environment variables.

When changed to C:\Tmp file path, the extracting files of Vmware workstation would be done to Tmp file in C, where the script errors that are occuring can be fully resolved with this method. The temp path has issues when reading the index.htm file in extracted Vmware folder. You can name your TEMP and TMP files as you wish, but remember to revert back to original PATHS for TEMP and TMP in environment variables, once your installation is made.

Hope this helps other panicked, irritated patrons.

Chaladi


This post will show you how to increase your default pagefile in windows to desired maximum. As this increment will help your system have more memory resources to outperform in some cases.


I have made a Video that will Show you precisely the instructions on how to increase the page file.


Increasing Pagefile in Windows


In this Post, i am gonna show you how to install CentOS in VMware workstation.

The below Video tutorials will take you to the edge of the process and explain you the complete installation process and services, things that counts when the boot process of the CentOS box initiates.

In the midst of the Video tutorials, the cursor has been intentionally dragged, highlighted some words, to show, say you the important things at the concerned stage. The Settings section in the midst of the installation process will come up with the setting of IP address, HOSTNAME for the CentOS, however the settings were not saved nor used later, the setup has been just show you that the setup of Static IP and HOSTNAME can also be achieved whilst installation. The later setup of HOSTNAME can be acquired from this LINK

For Linux it is recommended to disable the Firewalls and SE Linux (Security Enhanced), Ços the services interaction and communications of concerned protocols will fail by blocking so. However it can also be activated (firewall), but the manual port setup, services configurations are to be done after logging into CentOS box.

Part 1:

Part 2:

The setup of username and password is recommended and meant to be strong enough to secure your CentOS BOX.

If you have any doubts or queries regarding the setup or the process used for the setup, please do not hesitate to message me @twitter.com/chaladhi   or comment here. As of your convenience. !!!  :~)

Regards,

Chaladi


In this post, I have came forward with the instructions and guidance to set the permanent hostname for the CentOS box.

Centos LogoIn this video, you find the needed configurations to setup the HOSTNAME.

The ip-address you see in the /etc/hosts file has been acquired from the concerned system, using the “ifconfig” command. The ipaddress is needed to mention the hostname in the hosts file. However you can find the ipaddress of your own computer using Ifconfig command in TUI (terminal) mode.

The setup has been chosen in the CentOS platform, as the demand is noticed in high. You can follow the same instruction for other Linux distributions, however the path, commands, Shell usage affects the process.

Here I have used “nano” as text editor to edit the configurations files, however you can use you favorite text editor; VI, CAT or other’s. After i have used the nano /etc/sysconfig/network   or other files editing, i have manipulated the files and i have saved the configurations using the CTRL+X  buttons click and pressing the Y button for the asked query, whether to save the changes or not by the nano editor; so i am saying yes to save the things. This will save the configured things.

you do need to exit the current working shell to notice the changes of hostname. However it is recommended to logout of the box after changes and login back again.  The next post about how to set-up DNS will be published soon.

Here in the video, the hostname has been mentioned as linuxbox1, and the fqdn has been assigned as the linuxbox.centos1; however it is recommended to use the linux box as the hostname or to change the fqdn to be as linuxbox1; both are acceptable.  (edited-16-06-10)

If you have any queries,  comment here or else you can reach me @ twitter.com/chaladhi     or   facebook.com/chaladi


It’s been long time, visiting again this blog for another Worth post. This time I have been to blog intentionally to post about Setting up the user-defined name to the Virtual Machine, which will be worth using; helpful in navigating through the open tabs of VM’s or for the sake of easy viewing purposes.

VMware Logo

The below Video unveils the setting up of VM Name:

The network has been changed from NAT to Bridged for the sake of internal VM’s communication.

If the internet access or need to communicate with the Host operating system by the VM; Guest operating system, the NAT (Network Address Translation) should be left unchanged or to be configured for intended operation.

The removal of Floppy from the configuration window has been made intentionally to show, how the removal can be used as well. The removal of FLOPPY is recommended for some Computers, one which affects the boot process if the boot process is configured accordingly and had the FLOPPY in the Drive

The CDROM drive has been seen here with the “using C:\program files\ xxxxx” however if u want to use the original physical drive, you should choose  “USE PHYSICAL DRIVE”, It sets the HOST O.S (your original desktop or laptop’s O.S) CDROM drive to used. If you want to use the physical drive in the VMware as if yuo use the drive physically.

The rest queries could be answered here; however related posts and further advanced settings and configurations could be expected in the future blog posts.

%d bloggers like this: